Hello once again everyone!
Well this is a later reply then I would of wanted but! I finally have more models to show off that I finally finished painting. So without any more long winded introductions...
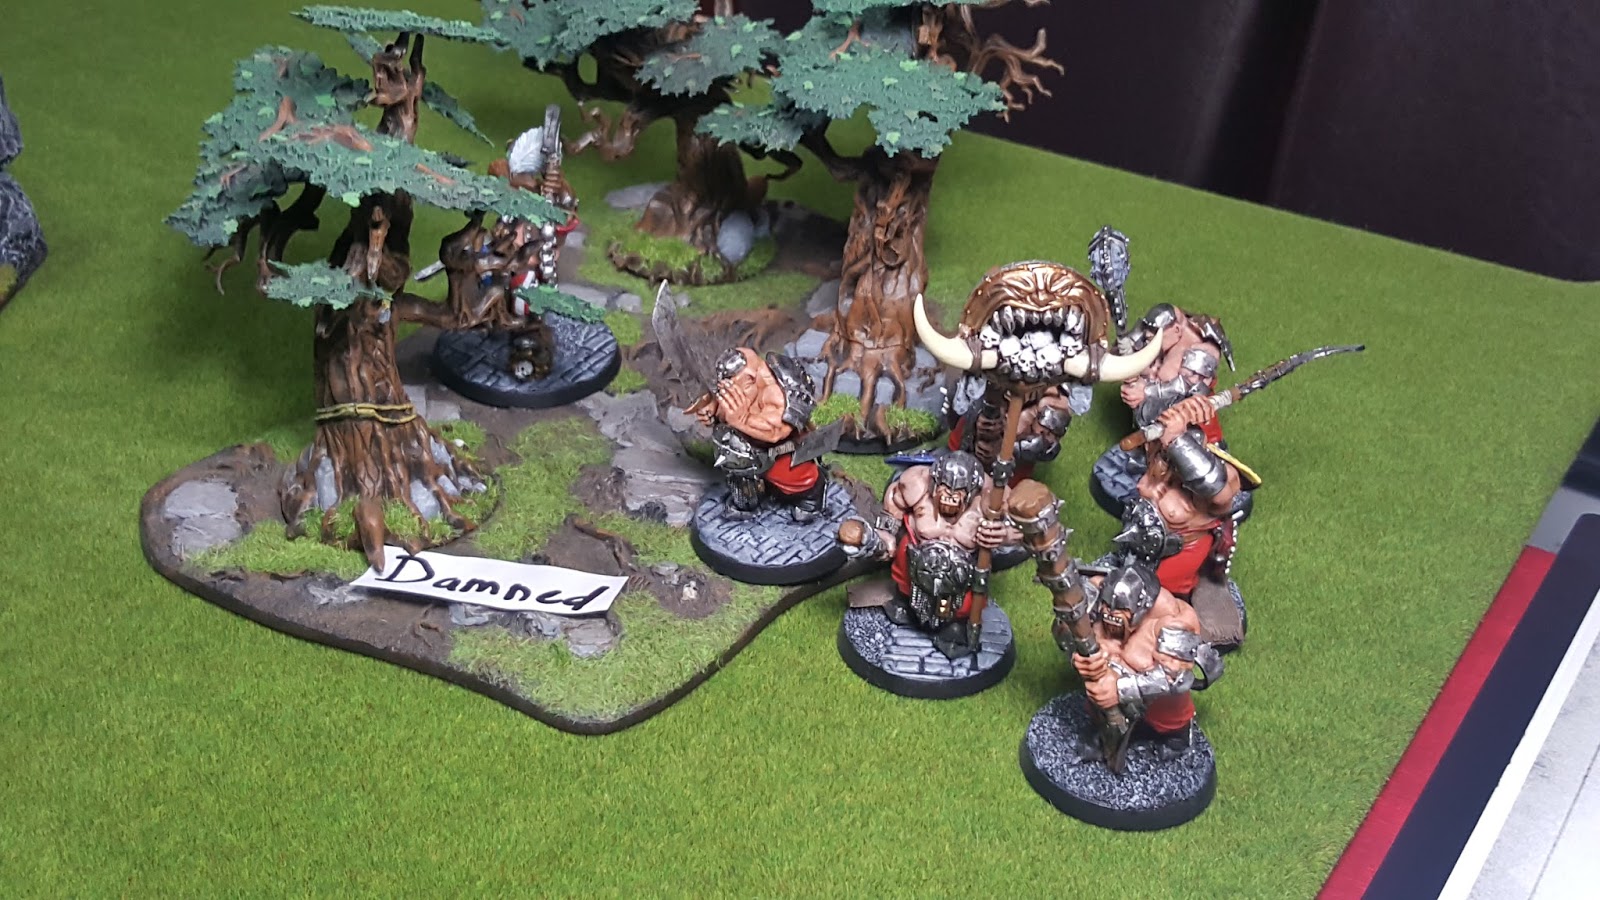
5 more Orc Boys! First minis finished for this month. I\m now over the half way mark for this unit of 40. 15 more to go and I finish the first unit for this Orc and Goblin army since 2014! Then I can move on and round out my core choices...I have so many goblins...
Anyway, with that said I've been kinda bored in Quarantine, so I setup a game of AoS Skirmish just for fun!
I didn't write a Battle Report but I thought I'd share a few highlights of Ezgut the Despoiler against Galerin Forgeheart. Following the rules for AoS Skirmish I started off the campaign with the Clash at Dawn Scenario.
The field as divided into 4 quarters and you roll off to see where you randomly deploy (roll 5 or 6 and you get to choose).
Stormcast all ended up on one half, Ogors on the other and Stormcast went first. Rules of this scenarios say there is a limit of 12" visibility for shooting attacks in the first turn as it is too dark to see.
Naturally, the Lord Relictor tried to use his Cursed Tomb to cast Mystic Shield on himself and rolled double 1, so took a mortal wound and then failed to heal himself.
Both sides quickly made a beeline for each other, the second Gnoblar on the other half of the field struggled to get closer.
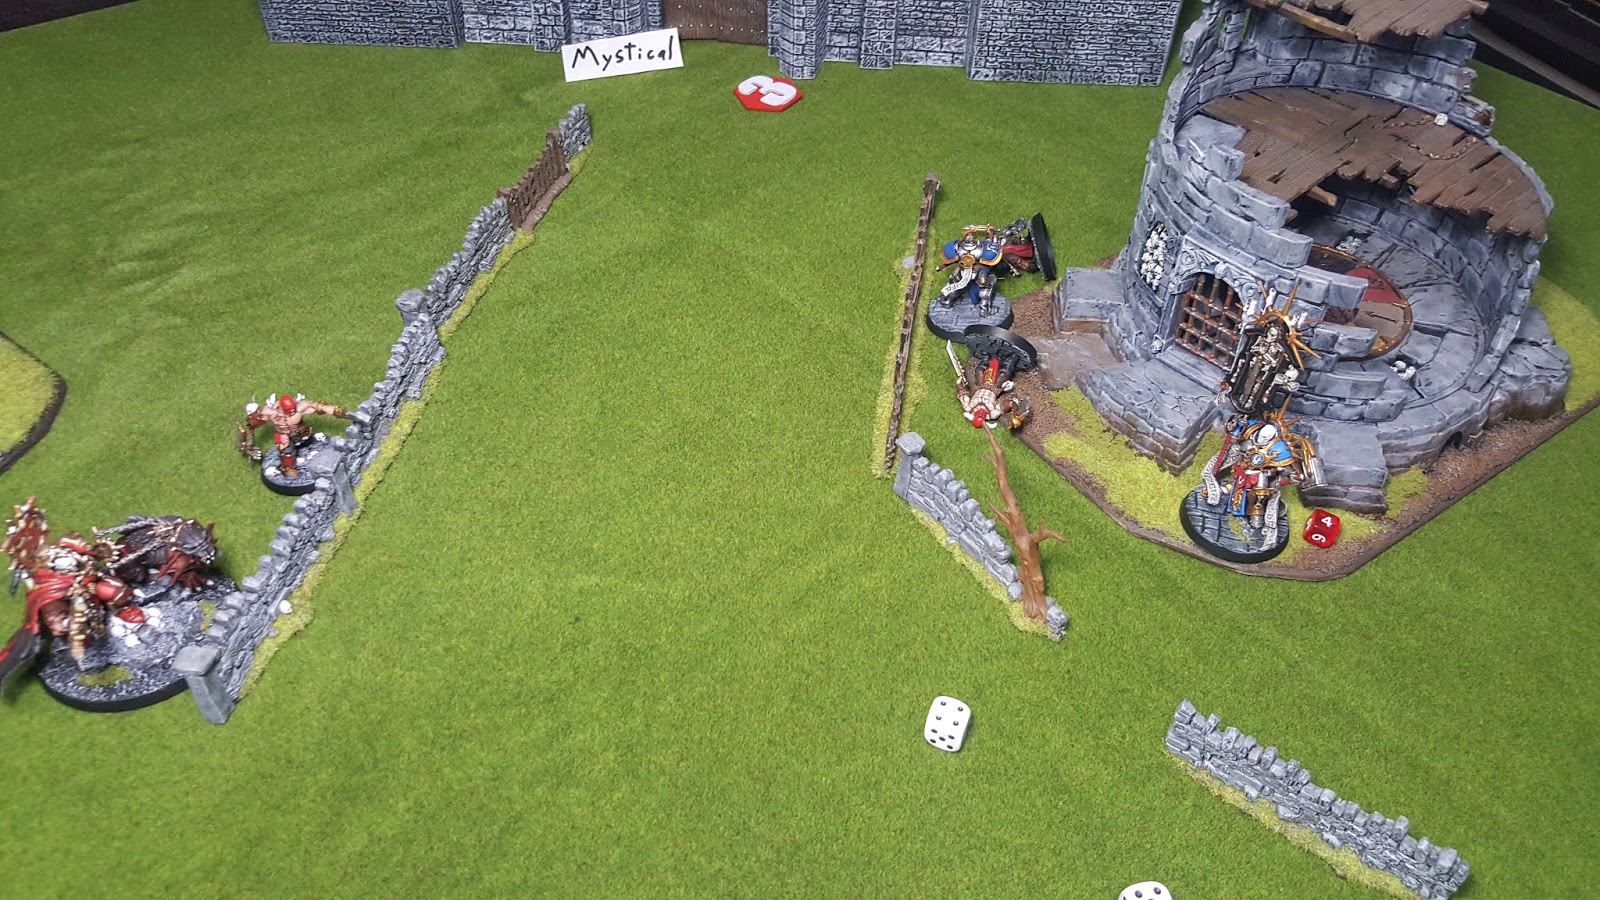
The Butcher easily took out the Liberator Prime although he got hurt in the process. Both the Relictor and Grandhammer decided to team up to fight the Butcher.
All attacks were focused on the two heroes. First one to drop would most likely lose this scenario. The Butchers Bloodgruel ability caused a wound on himself by rolling a 1.
In the end the Lord Relictor managed to finish off the Butcher while only having one wound left. The Grandhammer killed the Gnoblar with ease.
The last Gnoblar finally made its way across the field and tried to put one more wound on the Relictor but failed. With more then half the Ogor force got at the end of the third battle round it was over. Major Victory to the Stormcast!
That was fun but I do think Skirmish should be played without Heroes. They are too tough and If I'm going to continue these in the future I'm going to use Unit champions as the "Heroes".
Well that's all for now! Happy Quarantine!
-Commodus
Showing posts with label Battle Report. Show all posts
Sunday, 12 April 2020
Monday, 11 March 2019
Battle Report: Blood on the Streets, Age of Sigmar Skirmish 2.0
Hello again one and all!
So given how in the last 6 months or so I have managed to get a bunch of AoS minis painted up, I decided to finally do something with them. Now I know I don't have enough for a full 1000pt force like I plan on having for each. However I do have enough to try out the new AoS Skirmish game!
So January 2019's White Dwarf had new rules for playing Age of Sigmar in Skirmish. So using those rule I put together two 250 renown army lists to battle it out.
So lets take a look at the forces and also forgive me for the terrible lighting and picture quality.
Lar'Xan Skullslayer, Mighty Lord of Khorne and his retinue. Lar'Xan rolled up Impetuous Crusader for his command ability and Armourbane for his artifact of power. Joining him are Garrek's Reavers, two regular Bloodreavers and three Tzeentch Chaos Warriors.
On the other side of the table, Lar'Xan faced off against Galerin Forgeheart, Lord Relictor of the Hallowed Knights.
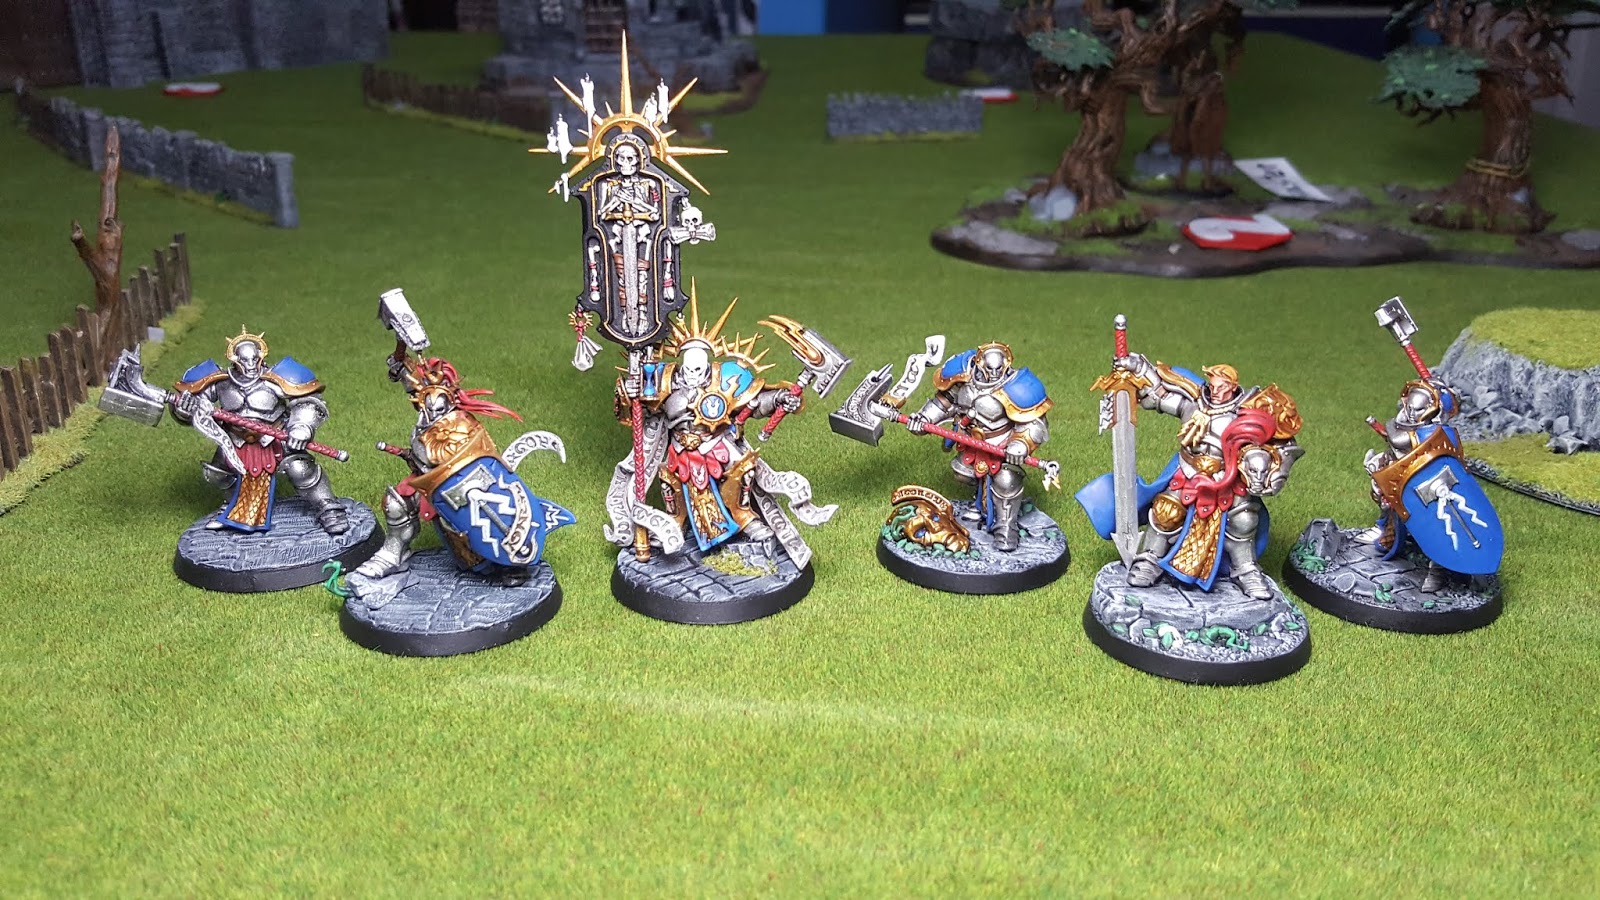
Galerin rolled Ambitious Fighter for his command ability and the Cursed Tome for his artifact of power. Following him were two Liberators, one prime and one with a greathammer. In addition Steelheart's Champions came along rounding out the group.
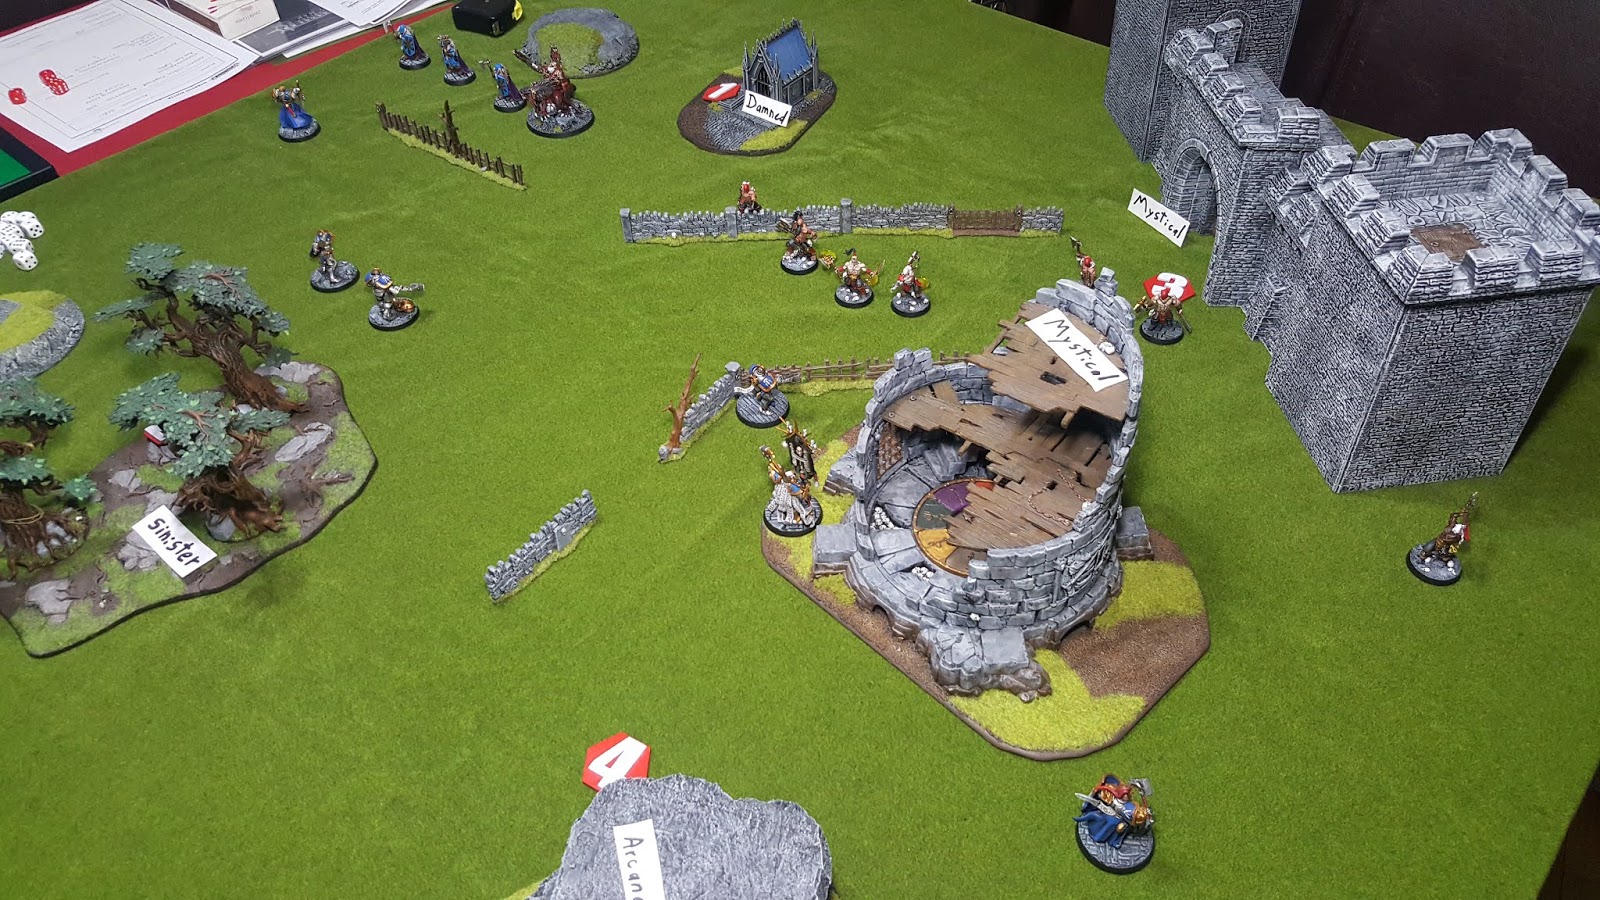
Lets take a look at the table and the Battleplan!
So using the new skirmish rules I rolled up Sweeping Assault. I also rolled up the terrain rules and marked them with my simple, but effective tokens!
There are four objectives on the field, at the end of each player turn your score points for each objective held. 1 point for each one in you deployment zone, 2 points for one held in your opponents zone.
Deployment
The Stormcast finished Deployment first and elected to take the first turn. Severin Steelheart on the left flank along with Oberyn and Angharad. Next to objective 4 Lord-Relictor Galerin and the Grandhammer Liberator setup while the Liberator Prime started next to the hill on the right.
Meanwhile on the opposite side Lar'Xan, th Mighty Lord of Khorne deployed next to objective 1 along with the three Tzeentch Chaos Warriors. Meanwhile Arnulf, Targor, Karsus and Garrek lined up together with Saek on the far right flank.
Turn 1 - Stormcast
In the Hero phase Galerin had no targets for his own prayers but did have the Cursed Tome. He tried to cast Mystic Shield on the Grandhammer but failed.
In the Movement phase all the Stormcast ran forward. Steelheart and his champions moved toward objective 1 while Galerin and the Liberators moved toward the objective on their side of the board.
No Battleshock, the Stormcast get 2 VP for controlling their own points.
Turn 1 - Chaos
In the Hero phase Lar'Xan used his Gorelord command ability on Garrek, Targor and Karsus.
In the Movement phase the whole battleline walked forward with the two Bloodreavers moving up just enough to get in front of objective 3.
In the Charge phase all three Chaos Warriors manage to charge Severin Steelheart but Lar'Xan, The Mighty Lord of Khorne, failed his charge roll and could not use his Impetuous Crusader command Ability as he did not have another model within 6" of him
Meanwhile Garrek and Targor charged Galerin, while Karsus charged the Grandhammer Liberator. All of them easily making their charge due to the Gorelord command ability.
In the combat phase Garrek managed to put a wound on the Lord-Relictor, who then proceeded to kill Garrek in return. The other reavers either failed to hit their target, or had their attacks saved by the stormcast armour.
Meanwhile on the other side of the field Severin and the 3 Chaos Warrior traded blows but neither side managed to wound the other.
Chaos passed it's Battleshock phase and scored 2 VP for controlling their own objectives.
The Stormcast won the die roll off for Turn 2 and elect to go first.
Turn 2 - Stormcast
In the Hero phase Galerin tried to use his Lighting Storm but failed his die roll. Wielding the Cursed Tome the Lord-Relictor cast Arcane Bolt on Karsus, rolling a double 6 and causing d3 wounds and slaying him.
In the Movement phase Oberyn and Angharad moved forward. Oberyn toward Arnulf and Angharad toward Lar'Xan. Meanwhile The Liberator prime on the flank moved up while the Grandhammer retreated from combat toward the Bloodreavers and objective 3.
In the Charge phase Angharad charges the Mighty Lord of Khorne while Oberyn charged Arnulf. The Liberator prime on the flank tried to charge Saek but failed. Which led to Galerin using the Forward to Victory Command ability to re-roll the charge...which still failed.
Combat phase, Angharad fails to wound Lar'Xan while he fails to wound her back. Oberyn missed all his attacks but Arnulf managed to hit him back but the wound was saved by his armour.
Meanwhile Severin Steelheart managed to slay one of the Chaos Warriors surrounding him while his grandblade. The other Chaos Warriors missed all their attacks.
On the other side of the field Targor missed his attack and promptly had his head caved in by Galerin. Chaos easily passed it's Battleshock test and the Stormcast scored 2 VP for continuing to hold the objectives in their zone.
Turn 2 - Chaos
In the Hero phase Lar'Xan used his Gorelord command ability on himself and the two Bloodreavers guarding the Objective.
In the movement phase Saek moved up to challenge the Liberator Prime sneaking around the tower while the Bloodreavers move to stop the Grandhammer.
In the Charge phase both Bloodreavers charge the Grandhammer while Saek rolled high enough that he decided to join them to gang up on the lone Stormcast.
In the Combat Phase both Bloodreavers and Saek, fail to hit while the Grandhammer retaliated and managed to kill Saek.
Meanwhile on the other end of the board Angharad managed to get 3 wounds on the Mighty Lord of Khorne but he managed to save them all. When attacked back Angharad was not so lucky and was cut down by Lar'Xan and his Axe of Khorne.
Oberyn and Arnulf trade blows but neither managed to harm the other. Meanwhile Severin missed all his attacks while a Tzeentch Chaos Warrior managed to cause a wound on Severin.
Each side passed their Battleshock test. Chaos scored 2 VP for continuing to hold thier objectives. The roll off for turn 3 was won by Chaos who elected to go first this battle round.
Turn 3 - Chaos
With the whole Chaos Army engaged Lar'Xan didn't use any command abilities. Instead he moved forward toward Oberyn to keep him off the objective.
In the Charge phase Lar'Xan charged Oberyn.
In the combat phase both Bloodreavers and the Grandhammer Liberator all miss their attacks. On the left flank Severin managed to kill another Chaos Warrior while the last surviving one managed to roll double 1's to wound Severin in return.
Lastly both Arnulf and Oberyn waved their weapons in each others face, unable to hurt each other. When Lar'Xans turn finally came around he promptly cut Oberyn down.
Battleshock is passed by both sides. Chaos scores 2 more VP for controlling their objectives.
Turn 3 - Stormcast
In the Hero phase Galerin used his Lightning storm ability on one of the Bloodreavers engaged with the Grandhammer and killed him with a mortal wound. The he followed that up with an Arcane Bolt which Lar'Xans Collar of Khorne failed to dispel, which then killed the second Bloodreaver.
With the area cleared of chaos worshipers the Lord-Relictor and both Liberators ran toward the open objective.
With no shooting or charges we skipped right to the combat phase. Severin went first and attacked the last standing Chaos Warrior and cut him down before he could retaliate. Leaving the field open before him to threaten the second chaos objective.
Chaos once again easily passes battleshock. The Stormcast manage to steal objective 3 from Chaos meaning they score 4 VP this round taking a lead in the game.
The roll off for turn 4 is a tie and Chaos elects to go first once more
Turn 4 - Chaos
With only 2 models left on the field Lar'Xan uses his Gorelord ability on himself and Arnulf.
In the Movement phase Arnulf made a b-line to the Stormcast side of the board with the hope he could survive long enough to steal an objective and keep the game from being a rout.
Meanwhile the Mighty Lord of Khorne moved toward Galerin and the Liberators hoping to cut through them to re-take the objective.
In the Charge phase Lar'Xan, with the help of his Gorelord command ability, made a long bomb charge and made it into contact with the Grandhammer.
In the Combat phase Lar'Xan failed to wound the Grandhammer but was not hit in turn. The combat also pull din the Liberator prime who failed to wound as well.
End of the turn and Chaos failed to take back their objective as the Grandhammer and Liberator Prime tied the Lord of Khorne for taking objectives. Chaos only scored 1 VP this round.
Turn 4 - Stormcast
In the Hero phase Galerin used his Lighting Strike ability on Arnulf killing him outright. He tried to use Arcane Bolt on Lar'Xan but failed to cast.
In the Movement phase Severin Steelheart ran toward objective 1 to try and take it from the Chaos hordes. Meanwhile Galerin move toward Lar'Xan to help push him off objective 3.
In the Charge phase the Lord-Relictor managed to charge into the fray with the Mighty Lord of Khorne.
With only one Chaos model left alive on the field it was right to the Combat phase. Galerin manage to get several blows in but Lar'Xan saved them in. In retaliation he struck out at Galerin but whiffed his attacks, meanwhile his Flesh Hound managed to put one wound on Galerin who failed his save.
The Liberator Prime struck out but failed to wound while the Granhammer managed to hit causing 2 wounds on the Mighty Lord of Khorne.
Chaos passed his Battleshock test. With Galerin in range the Stormcast still held control of the objective scoring 4 VP this round.
Things are certainly looking grim for the forces of Chaos. With the roll-off for the turn, Lar'Xan won 5 to 2 and elected to go first.
Turn 5 - Chaos
There didn't look like there was a way for Chaos to come back in this fight. So Lar'Xan consoled himself knowing that he could at least serve the Blood God by taking Galerins head!
Going straight to the Combat phase Lar'Xan threw all his attacks into Galerin...and missed them all. Next up to attack was the Grandhammer Liberator who wounded with both of his attacks. Leading to Lar'Xan failing his save and falling over dead at his hands.
With Lar'Xan dead the Stormcast have swept the field of Chaos and control all objectives. Victory to Lord-Relictor Galerin and the Hallowed Knights!
Well that was my first game of Skirmish 2.0. I certainly prefer it over the old version and I hope they include the rules for it in the next General's Handbook 2019.
That's all for now, until next time!
-Commodus
Monday, 14 May 2018
Battle Report: Gunrock Clan Vs The Mountain Eaters - Age of Sigmar
Hello all!
Back again and this time it's for another battle report featuring my Gutbuster Wartribe 'The Mountain Eaters" versus the children of Hashut "The Gunrock Clan".
Picking off after my last Battle report (that was freaking ages ago) the Mountain Eaters have moved into the the Aver plains, smashing and looting villages around the Averholme. The local forces sent out to face them were pushed back brutally by the Ogors. Before the Grand Army of the Averholme could meet them in battle they scampered back north with their loot.
The Gunrock Clan, the Chaos Dwarfs of the northern reaches had sent out a slaving party and hoped to intercept the Ogors before they could meet up with the main Wartribe. With the prospect of loot and slaves Ammrik Gunrock, Sorceror of the clan, took command of the warband to defeat the Ogor tribe before they could escape.
Table Setup
I rolled up terrain for the table getting 6 pieces and setting them up as per the rules. Next up ws to set the terrain rules.
As I have no fancy tokens to designate terrain I just wrote down what I rolled on paper for easy reference.
Finally with the Terrain setup I rolled for a battle plan. This time it looks like we will be playing Border War! There will be 4 Objectives on the table One in each deployment zone and two across from each other in the center zone. At the end of each turn you capture the Objective if you have more models then you opponent within 6". The one in your zone is worth 1, the ones in the center are worth 2 and the one in the enemy deployment zone is worth 4.
With the battle field setup and the scenario rolled for it's time to take a look at the forces ready to do battle. We decided to roll for both Command traits and Artifacts to make things interesting.
The Mountain Eaters - 1000 points
Tyrant
- Club, Basher or Slicer, Ogor Pistols
- Battle Trait - Rampaging Destroyer
- Command Trait - Nothing Left Standing
- Artifact - Battered Talisman
Ogors x 6
- Ironfists
- Bellower and Tribal Banner
Ironguts x 6
- Bellower and Runemaw
Ironblaster
Gorger
The Gunrock Clan - 1000 points
Daemonsmith
- Pyre Rune Staff
- Battle Trait - Unpredictable Destruction
- Command Trait - Great Destroyer
Infernal Guard Battle Standard Bearer
- Artifact - Favour of the Gods
Infernal Guard Ironsworn x 20
- Deathmask, Icon Bearer, Drummer
Infernal Guard Fireglaves x 10
Deathquake Mortar
Chaos Gargant
Chaos Gargant
*a note: While the above list is running the Legion of Azgorh allegiance meaning it's technically over the allies limit with the 2 Gargants, we just said "screw it" and rolled with it. It's been a long time since I've taken my Chaos Dwarfs out of storage and I wanted to use them and this is all I had painted sooo who cares!
--------------------------------------------------------------------------------
Deployment
The Gunrock clan won the roll to choose a side but the Gutbusters finished deploying first and took first turn.
Turn 1 - The Mountain Eaters
Before the first turn the Tyrant rolled for his Big Name and got Deatheater. So the Tyrant will have +1 wound.
Hero Phase
The Ironblaster was within 3" of the Mystical hill and, of course, rolled a 1 and would be befuddled this turn.
The Tyrant used his command ability "Bully in the first Degree" on the Ironguts. They took 2 wounds but would be immune to Battleshock for the rest of the battle. Lastly the Tyrant used his Battle Trait "Rampaging Destroyers on the Ironguts but failed.
Movement Phase
All the Ogor units ran forward and got within 6" of the Objectives in the Middle half of the table. The Gorger appeared next to the Ogors on the right to assist them in taking down the Gargants.
With no shooting due to a befuddled Ironblaster and the Tyrant out of range with his pistols there was no shooting this turn. Both units were out of range to charge as well leading to the end of the first Battle round.
The Mountain Eaters had their befuddled Ironblaster sitting on their own side objective while the Ogors and Tyrant were in range to grab the two middle Objectives.
Score:
Mountaineaters: 5 Gunrock Clan: 0
Turn 1 - Gunrock Clan
Hero Phase
Both the Fireglaives and the Dreadquake Mortar passed their befuddled test due to being too close to the mystical terrain, the Gargant was just out of range and was safe.
The Daemonsmith general used his Battle Trait on the Ironsworn Guard out on the flank but failed on a 3. He then used his Inspiring presence on them as well as successfully cast Mystic Shield. Giving the Ironsworn a much needed armour boost if they were going to tangle with the Ironguts!
Movement Phase
The Giants on the flank both ran up to get closer to the objective. While the Fireglaives walked up to keep the Objectve behind them and to stay out of charge range of the Ogors.
Meanwhile the mortar moved a few inches away from the Mystical terrain to make sure they do not get befuddled like the Ironblaster did.
The Ironsworn Guard and BSB on the opposite flank also moved forward to get in range to charge the Tyrant. Meanwhile the Daemonsmith ran into Arcane terrain to get the +1 benefit next hero phase.
Shoot Phase
With the fireglaives just out of range of the Ogors the Dreadquake Mortar fired on the Tyrant and hit causing 3 wounds.
Charge Phase
The Ironsworn attempted to Charge in and finish off the Tyrant but fail their charge on a roll of a 4.
With no combat the Gunrock Clans first turn ends. After measuring it seems the Ogors have more models closer to the middle objectives and keep them away from the Dawi-Zharr this turn. Meaning they only capture their own zone objective for now.
Score:
Mountain Eaters: 5 Gunrock Clan: 1
The roll off for Turn 2 is won by the Mountain Eaters.
Turn 2 - Mountain Eaters
Hero Phase
The Tyrant used his Rampaging Destroyer Battle trait on the Ironguts which went off on a 6, causing them to bound forward 6" to get in the face of the Ironsworn Guard.
Meanwhile the Ironblaster passed it's Mystical terrain test and would be ensorcelled this turn.
Movement Phase
On the opposite end of the battlefield the Gorger ran to get in the way of the Giant coming around the other side of the building, while the Ogor walked up to get more models on the Objective. Meanwhile the Ironblaster walked up to get in range with it's cannon.
The Tyrant and the Ironguts both moved up even closer to the Ironsworn although the Tyrant stayed in range of the Objective.
Shoot Phase
The Tyrant picked up his pistols and fired on the Daemonsmith in the tower but missed with both shots. Meanwhile the Ironblaster targeted the closest Gargant but failed to hit on a 1.
Charge Phase
The Gorger failed to charge the Gargant on the left side while the Ogors roll 10" and managed to charge the other Gargant and completely surround him!
Meanwhile the Ironguts and the Tyrant both manage to charge the Ironsworn.
Combat Phase
In the Combat phase the Ironguts elected to go first and laid into the Dawi-Zharr causing 10 hits followed up by 10 wounds!
Even with Mystic shield protecting them the Ironsworn failed half their armour saves. With Ironguts causing 3 wounds a piece 15 Ironsworn Guard fell to the Ironguts. However the Ironsworn carried their spiteshields and saved 4 of their 5 saves on a 6 causing 4 mortal wounds back killing an Irongut.
Next up the Gunrock Clan elected for the Gargant to go next. He caused 5 wounds on the Ogors who managed to save 1 on a roll of 6, causing a mortal wound back to the Gargant due to their ironfists. The Gargants other attacks all failed although he did manage to kill one Ogor.
The Tyrant decide to step up and try to finish off the Ironsworn. Swinging with his club and slasher he caused 5 wounds of which only 1 was saved. Of the unit of 20 only the Deathmask remained.
The Infernal Castellan was within range and pilled into the Ironguts but failed to cause any wounds on the Ogors.
The Ogors went next and laid into the Gargant. When the dust settled the Gargant took 8 more wounds greatly reducing it's combat ability.
Lastly the Deathmask of the Ironsworn attacked the Ironguts causing 1 more wound. Unfortunetly, it was not enough to drop another Irongut.
Battleshock Phase
With both the Ironguts and the Ironsworn immune to battleshock only the Ogors facing the Gargant had to test this turn which they easily passed.
With the Gunrock clans line held back the Mountain Eaters still had more models closer to the objectives and held them once again this round, scoring another 5 points.
Score:
Mountain Eaters: 10 Gunrock Clan: 1
Turn 2 - Gunrock Clan
Hero Phase
Very behind in points, The Daemonsmith looked to try and salvage this battle. He used his Battle trait "Unpredictable Destruction" on the Fireglaives and succeeded on a 6. He then also placed Inspiring presence on them as well. Especially since it did not look like the Ironsworn Guard were long for this world in the face of the Irongut onslaught.
The Daemonsmith cast Arcane Bolt on the Ogors engaged with the Gargant and succeeded, but only caused 1 wound.
Lastly the Castellan BSB planted his Black Banner of Malice to re-roll 1's to hit in a last ditch effort to hold the flank.
Movement Phase
The Fireglaives move closer to the Ogors while the Dreadquake Mortar moved up to get just within 6" of the objective. Meanwhile the second Gargant on the left flank moved just outside 3" of the Gorger. The Daemonsmith ran down from the top floor of the broken tower to get closer to the Fireglaives but still keep the +1 from the Arcane ruins.
Shooting Phase
The Fireglaives unload their guns on the Ogors but mange to cause only 1 wound. While the Mortar, lobbed a shot at the Ironguts and hitting them, but only managing to roll 2 wounds. However it was enough to drop another Irongut.
Charge Phase
The Giant on the left flank charged the Gorger, while the Fireglaives made a long charge into the Ogors in an attempt to help the Gargant barely holding on with 3 wounds.
Combat Phase
Seeing as he only had 3 wounds left, the Gunrock Clan elected to have the wounded Gargant go first to try and finish off a few Ogors. Unfortuntly he only managed to cause 1 wound with all his attacks, which was promptly saved on a 6 causing a mortal wound to the Giant instead due to the Ogors ironfists.
The Ogors, fearing losing control of the objective due to the mass of Fireglaives that had joined the battle, directed all the attacks they could into the Dawi-Zharr and...
...wiped them out to a man.
The one Ogor out of range of the Fireglaives attacked the Gargant but failed to cause any wounds on him.
The second, unscathed Gargant elected to go next and easily 'Eadbutted the Gorger to death.
The Mountain Eaters had the Tyrant go next and he attacked the Castellan causing 3 wounds, one of which was saved leaving the BSB with only 1 wound left. The Castellan then decided to go next in a desperate attempt to kill the Tyrant. But only managed to get one hit through causing 2 wounds on the Tyrant. He was hurt but not out yet!
The Ironguts got to go next. Two of the Ironguts attacked the Deathmask while the other two attacked the Castellan. Sadly, the Castellan was no more as the bellower of the unit crushed his skull with his club. The Deathmask proved to be the hero the Dawi-Zharr needed as they only managed 2 wounds on him both of which were saved! (Sadly only on a 5, so no wounds back due to the spiteshield).
Only the Deathmask remained but he failed to wound the Ironguts.
Battleshock Phase
No battleshock this turn.
Score:
Mountain Eaters: 10 Gunrock Clan: 2
It didn't go well for the Gunrock Clan. They were not able to get enough models in range of the Objective and the Mountain Eaters still held them for another turn. This roll for turn would be critical as the Gunrocks needed to pull some objectives away from the Mountain Eaters or risk losing the whole battle!
Fate was on the side of the Dawi-Zharr and they would get a double turn!
Turn 3 - Gunrock Clan
Hero Phase
The Daemonsmith used his Battle Trait on the Dreadquake Mortar and succeeded on 5 due to his Command trait "Great Destroyer". He then cast Arcane Bolt on the Ogors and succeeded causing 3 wounds and killing an Ogor.
Movement Phase
The Daemonsmith then ran as fast as he could to his warmachine getting to within 3" of it so he could potentially whip the Slave Ogor on it in the shooting phase.
Meanwhile the Deathmask retreated away from the Ironguts hoping to tempt the Ironguts into pursuing him and leaving their deployment zone objective alone. Meanwhile the still unhurt Gargant moved up to within 3" of the Ogors.
Shooting Phase
The Daemonsmith proceeded to whip the Slave Ogor and rolled a 6! The Dreadquake Mortar will be able to shoot 2 shots this turn. The mortar set it's sights on the Ironguts and managed to hit and wound with both shots causing 7 wounds!
Charge Phase
The Gargant barely charged the Ogors with the roll of a 4.
Combat Phase
Once again, seeing as his end was nigh, the wounded Gargant went first and attacked the Ogors and managed to cause 4 wounds. However the Ogors saved one on a 6 causing a mortal wound back leaving the Gargant with only 1 wound.
The Ogors attacked the wounded Gargant but completely failed to cause any wounds! Meanwhile the Ogor Crusher attacked the other Gargant and managed to put 2 wounds on it.
Finally the second Gargant, angry that he will not get his 3d6 attacks due to the wounds put on him did manage 10 hits on 2d6 and 5 wounds. Followed up by both his 'Eadbut and Mighty Kick attack each rolling maximum wounds and wiping out the unit!
Battleshock Phase
No Battleshock this turn
The Gunrock Clan finally started to flex it's muscle and finally hit the rampaging Gutbusters back hard. However they only managed to take back one objective and it may not be enough in the end.
Score:
Mountain Eaters: 10 Gunrock Clan: 5
Turn 3 - Mountain Eaters
Hero Phase
The Tyrant used his Rampaging Destroyers on the remaining Ironguts which succeeded on a 5.
Movement Phase
The Tyrant, Ironguts move towards the Daemonsmith while the Ironblaster moves towards the Gargants hoping to finish them off.
Shooting Phase
The Tyrant whipped out his pistols and tried to finish off the last Ironsworn hiding in the corner but failed to hit. Meanwhile the Ironblaster fired its cannon at the wounded Giant and finally managed to kill it causing a grand total of 1 wound.
Charge Phase
The Ironguts charge 9" into the Daemonsmith but have enough distance to wrap around and pull the Mortar into combat as well. Meanwhile the Ironblaster failed it's charge on the remaining Gargant.
Combat Phase
Being the only Gutbuster unit in combat (Damn dice!) the Ironguts go first and through all their attacks into the Daemonsmith, but only cause 2 wounds. Which he managed to save!
The Daemonsmith and the Mortar attack back but both fail to cause any wounds on the Ironguts.
Score:
Mountain Eaters: 13 Gunrock Clan: 5
With no loss of models this turn there was no Battleshock phase however the Mountain Eaters still had a commanding lead in points. Luckily for the Gunrock Clan the Ogor did not outnumber the models sitting on their deployment zone objective. Meaning the Dawi-Zharr still held their home objective and denied the Mountain Eaters 4 more points. The roll off for turn 4 could decide how the game ends.
And once again the Gunrock Clan comes out ahead!
Turn 4 - Gunrock Clan
Hero Phase
The Daemonsmith tries to use Rampaging Destroyers on the Mortar again but failed. he then managed to cast Arcane Bolt on the Ironguts causing 2 more wounds
Movement Phase
The Giant moved up as close as it could to the Ironblaster to, hopefully, destroy it next combat phase.
Meanwhile the Deathmask, looking to be a hero ran past the Tyrant toward the Middle objective managing to roll a 6 on his run check.
Shooting Phase
The Daemonsmith failed to lash the Slave Ogor manning the Mortar, most probably due to the fact he was locked in combat with his large, not enslaved brother.
The Mortar range meant it was not able to fire on either the remaining Irongut or the Tyrant as they were too close. So it fired on the Ironblaster, striking it for 4 wounds.
Charge Phase
The Giant Charged into the Ironblaster with ease.
Combat Phase
Facing down two man eating Ogors the Daemonsmith was chosen to go first. He managed to crack the bellower in the head with his Pyre Rune staff. He then proceeded to fail his armour save and suffer 3 wounds dropping him and leaving the last Irongut with 2 wounds.
Fearing the damage potential of the Gargant the Ironblaster went next but only managed 1 wound for his efforts.
The Dreadquake Mortar was selected to go next but both wounds the crew managed to strike were saved by the armour of the last Irongut.
Finally the Rune Maw bearing Ogor crushed the Daemonsmith with his club, finishing him off once and for all.
Lastly the Gargants Massive Club caused 3 more wounds on the Ironblaster before finally being utterly destroyed by a single Mighty Kick from the Gargant.
Battleshock
As the Ironguts were still under the effects of "Bully in the First Degree" there was no battleshock this round.
At the end of the Gunrock Clans 4th turn the field was looking sparse of minis. The Ironguts still did not outnumber the Dawi-Zharr so the Gunrocks held on to their deployment objective. Meanwhile the lone Deathmask got to JUST within 6" of the right objective, taking it from the Mountain Eaters while the Gargant held the rest of the field/
Score:
Mountain Eaters: 13 Gunrock Clan: 10
Turn 4 - Mountain Eaters
Hero Phase
The Tyrant used his Rampaging Destroyer on himeslef but failed the roll
Movement Phase
The Tyrant marched up to get into charge range of the Mortar.
Shooting Phase
The Tyrant pulled out his pistols and fired on the Deathmask and finally managed to put a bullet through him, finishing him off for good.
Charge Phase
The Tyrant managed to charge into the Mortar to aid the last Irongut in finishing off the Chaos Dwarf warmachine.
Combat Phase
The Tyrant elected to go first and struck the Mortar with his Clubs and Slashas causing 4 wounds. The warmachine had 10 wounds and would be hard to shift.
The warmachine crew struck back but failed to land any hits.
Lastly the Irongut had his chance to finish off the Mortar but fail to cause any wounds.
Battleshock Phase
No Battleshock this phase.
The Tyrant failed to finish off the Mortar, but he did lend enough weight to take the home objective away from the Gunrock Clan
Score:
Mountain Eater: 18 Gunrock Clan: 10
With the final turn looming the winner would no doubt be whoever won the roll off...alas for the Gunrock Clan the turn went to the Gutbusters.
Turn 6 - Mounatin Eaters
The last turn of the game would be swift. Under a hail of pistol shots and rusted weapons the Mortar fell beneath their blows.
With the Mortar unable to finish off either of the Gutbusters they held the Objective scoring another 5 points.
Turn 5 - Gunrock Clan
The last Gargant took the Gutbuster objective scoring a total of 8 points at the end of the turn, but it was just not enough to overcome the Mountain Eaters this time.
Major victory to the Gutbusters!
Final Score
Mountain Eaters: 23 Gunrock Clan: 18
-------------------------------------------------------------------
The Daemonsmiths slaver force had been beaten back. The Ogor Tyrant held the field and the last of the Dawi-Zhar that could walk limped back to their territory, with not a slave to show for it. Meanwhile the Gutbusters grabbed their loot and headed back too their main camp. Hoping to get ahead of any further force that could stop them from returning home with their loot.
Perhaps a clash between the main armies of the Mountain Eaters and the Averholme will be soon. That however, will be a tale for another day.
---------------------------------------------------------------
Well that was closer then it should have been! I have never played my Chaos Dwarfs in AoS so when I decided to use them against my opponent I really wasn't sure what to do with them. So the fact that I got such a close defeat means that I can at least think on the fly.
The Gutbuster rampage continues across the Aver Plateau. Who knows what will be up next for out Ogors.
Bye for now!
-Commodus
Subscribe to:
Posts (Atom)